If you’re a fan of fruity desserts with a touch of rustic charm, blackberry crumble bars are a must-try.
These bars combine the sweet-tart goodness of blackberries with a buttery oat crumble that’s both chewy and crisp.
Whether you’re making them for a picnic, afternoon tea, or just to treat yourself, these bars are simple to make and incredibly satisfying.
In this post, I’ll guide you step-by-step on how to prepare blackberry crumble bars from scratch, using fresh or frozen blackberries, pantry staples, and a few easy techniques.
Ingredients You’ll Need
For the crumble and crust:
-
1 cup (2 sticks) unsalted butter, melted
-
1 cup granulated sugar
-
1 tsp vanilla extract
-
2 cups all-purpose flour
-
1 cup old-fashioned rolled oats
-
1/2 tsp salt
-
1/2 tsp baking powder
For the blackberry filling:
-
3 cups fresh or frozen blackberries
-
1/3 cup granulated sugar (adjust depending on berry sweetness)
-
2 tbsp cornstarch
-
1 tbsp lemon juice
-
1 tsp lemon zest (optional)
Step-by-Step Instructions
Step 1: Prepare the Oven and Baking Pan
Start by preheating your oven to 350°F (175°C), which ensures it’s hot and ready by the time you’re done prepping.
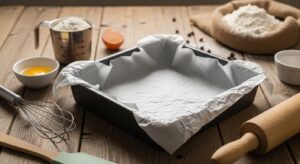
Take a 9×13-inch baking pan and line it with parchment paper, making sure to leave some extra hanging over the sides.
This overhang will act like handles, making it easy to lift the bars out after baking.
For extra security against sticking, lightly grease the parchment with a bit of butter or non-stick spray.
This setup helps you achieve clean edges when slicing the bars later.
Step 2: Make the Crumble Mixture
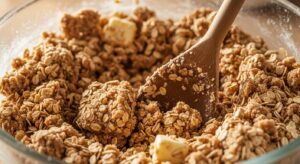
In a large mixing bowl, pour in the melted butter, followed by the granulated sugar and vanilla extract. Stir everything together until smooth.
Next, add the flour, rolled oats, salt, and baking powder. Use a spatula or wooden spoon to combine the ingredients until the mixture becomes thick and crumbly.
It should resemble a rough dough that holds together slightly when pressed between your fingers.
Be careful not to overmix—you want a loose, rustic crumble texture that will become golden and crisp in the oven.
Step 3: Form the Crust

Take about two-thirds of your crumble mixture and transfer it to your prepared baking pan.
Spread it out evenly, then use your fingertips or the flat bottom of a measuring cup or glass to press it firmly into the pan.
This will form the crust layer, which should be compact enough to hold the filling without crumbling apart.
Make sure the crust is spread all the way to the edges of the pan and is evenly packed for even baking.
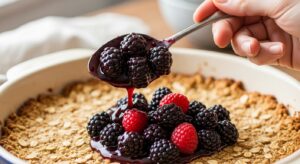
Step 4: Make the Blackberry Filling

In a medium-sized bowl, add your blackberries—either fresh or frozen (no need to thaw if frozen).
Sprinkle the sugar over the berries, then add the cornstarch, lemon juice, and optional lemon zest.
Gently toss everything together using a spoon or your hands, making sure the blackberries are well coated.
The sugar draws out the juices while the cornstarch will help thicken the filling as it bakes.
Let this mixture sit for about 5 minutes so the ingredients can begin to meld and release those delicious juices.
Step 5: Layer the Blackberry Filling
Once your berry mixture is ready, spoon it evenly over the crust you pressed into the pan.
Try to distribute the blackberries across the entire surface, spreading them all the way to the edges so that every bar gets a generous amount of filling.
Pour in any leftover juices from the bowl, as this adds extra flavor and helps with that gooey, jammy texture you want in the center of the bars.
Step 6: Add the Crumble Topping
Take the remaining one-third of the crumble mixture you set aside earlier and gently sprinkle it over the top of the blackberry layer.
Don’t press it down; just let it fall naturally in uneven clumps.
This will give your bars that signature rustic, golden topping with plenty of crispy bits.
You can break the topping up slightly with your fingers if the chunks are too big, but some variation in size adds great texture.
Step 7: Bake the Bars
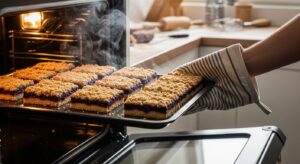
Slide your pan into the preheated oven and bake for 35 to 40 minutes.
You’ll know it’s ready when the crumble topping is golden brown and the blackberry filling is bubbling at the edges.
This bubbling means the cornstarch has activated and thickened the filling. Once baked, remove the pan from the oven and place it on a wire rack.
Let the bars cool completely—this is important! Cutting them while warm can cause them to fall apart or ooze too much.
Step 8: Slice and Serve
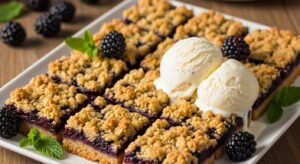
After the bars have cooled fully (this may take at least an hour), grab the parchment paper overhang and carefully lift the whole slab out of the pan.
Place it on a cutting board and use a sharp knife to slice it into even squares or rectangles, depending on your preference.
These bars are delicious on their own but even better when served slightly warm with a scoop of vanilla ice cream, a dollop of whipped cream, or even just a dusting of powdered sugar.
Read More: How To Prepare Blackberry Smoothie
Tips for Success
-
Fresh vs. Frozen Berries: Both work well. If using frozen, don’t thaw them to avoid excess moisture.
-
Storage: Keep leftovers in an airtight container at room temperature for up to 3 days, or refrigerate for up to a week.
-
Freezing: These bars freeze beautifully—wrap tightly and freeze for up to 2 months.
Things to Avoid
-
Overbaking: Watch for golden brown edges. Overbaking will dry out the crust and filling.
-
Using instant oats: Stick to old-fashioned rolled oats for the best texture.
-
Cutting too early: Let the bars cool completely before slicing to avoid a gooey mess.
Read More: Autumn Baking Ideas
Final Thoughts
Now that you know how to prepare blackberry crumble bars, you’ll want to make them again and again.
They’re a perfect blend of sweet, tart, buttery, and crisp—all the elements of a comforting homemade dessert.
Great for summer berry season or a year-round treat with frozen berries, these bars are sure to win over your family and guests alike.